Activity Pack: Explainer Videos
This book includes resources, readings, videos and instructions for completing this micro-course.
I've created this in a book format so you can save it as a .pdf for future reference.
There are 6 chapters, one for each step (or day) of the course plus a bonus chapter with additional resources and examples.
See you inside :-)
First - If you have set your learning goal or objective to create a plan, script, and/or storyboard, you should just save this chapter - tuck it away and come back to it next week or whenever you are ready for it. You do not need any special tech to plan, script or storyboard. You just need ideas and a way to capture them.
To complete your planning, scripting, and story-boarding you'll only need a way to write and something to write on. Pen/paper, post-its, index cards, word processor, Google docs, or if you want to get fancy, PowerPoint (or equivalent).
Second - If you plan to complete an explainer video this week, you probably have all that you need, in the tech department.
If you have accessed this course on a smart phone, tablet, laptop, or desktop computer (PC or Mac) you have the technology required to produce an explainer video.
Ok, maybe if you are on a desktop machine with no microphone, you may have some troubles. But even that can be worked around.
Basic Requirements to Produce a Video
You will need:
1. Some kind of video editing or production software (I'm including apps in this). This is where it gets kind of confusing. Its confusing because there are sooooo many options.
2. A way to record audio and get it into your video editing software or app. A smart phone that has the ability to record audio might do. The only challenge with this option is exporting the audio in a format that you can upload to your video editing software. In many cases the software you will use to edit your video will have a way to record directly into it. The challenge with this is that the audio quality may not be great. You can produce a perfectly usable explainer video without audio but its a lot more work and may not be as effective.
2a. Ideally, a microphone that works with the choice you make in 2.
Video Options
This is FREE (upgrades available) and has versions for a variety of devices (cloud app or iOS). Its a great option although there is a wee bit of a learning curve. But there are lots of how-to videos too.
On the desktop version you'll need to add a microphone, but that's about it.
The downside of this option is you don't have as much control over the look and feel.
Similar options include:
Animoto: Animoto has been around for a very long time. You can try it for free (for 14 days) and there are paid subscriptions. The education versions are free so if you like it and have a school email address you can apply for a free classroom account. It allows more control, has fewer templates, but narration is a bit trickier.
emaze: Free and paid plans. Technically "presentation software" but works for explainer videos. If you choose this option here is a how to add audio tutorial. https://youtu.be/Ou9bQ7sb07o
Powtoon: You can create a free video that is up to 3 minutes long. Here's how to add a voice-over to a Powtoon. https://support.powtoon.com/en/article/adding-a-voiceover-to-your-powtoon
VideoScribe: This is a really nicely designed white-boarding app. It is not free but there is 7 day free trial. Narration is a bit more difficult (here's how http://help.videoscribe.co/support/solutions/articles/1000033726-record-a-voiceover) with VideoScibe - I've used it a lot by exporting the animation and syncing up the video and audio in Camtasia.
2D and 3D Animation Apps
CAUTION: These animation apps do a great job of animating people. The result of this is a cartoon styles talking head video. If you choose one of these may have to get a bit more creative, to stay within the explainer video genre.
Vyond (formerly GoAnimate): Free trail. It's pricey to purchase but does allow you to sync your cartoon self to the narration.
Moovely: If you have an "education" email you can get a free version. Like Vyond, Animaker, Raw Shorts, and Plotagon, Movely lets you create animated cartoon that talk.
Animaker: Less expensive than some others but I am not sure how to access a free trial or if they offer anything other than bulk buys for educators.
Raw Shorts: The techiest option - Use artificial intelligence to create your explainer videos. How cool is that! They have a free trial.
Plotagon: I have a soft spot for Plotagon. Their 3D animation software is pretty easy to use and they do have a free version Plotagon Story available for iOS and Android. I have the free Story version on my Mac and PC also - no idea how I did that though :-/
Or....
The options above are all variations of animation, whiteboard, and video production apps. Yet another option is to use the video editing software that probably came with your preferred device - Mac has iMovie, most PCs come loaded a Windows version that includes movie editing software, and your tablet or mobile device could have something usable, or a low cost app may be lurking around your screen, forgotten and unnoticed.
If you are techie type, you may have some kind of dedicated video editing software already - Camtasia is my personal favorite and of course Adobe Premiere Pro and After Effects are truly cool, but have a considerable learning curve and cost.
The Paradox of Choice
Choices! I know. Here is the conundrum. If I tell you which one to use, you may not have the option available. But, in providing so many options I have created an environment where analysis paralysis could take hold. What to do?
Here is my suggestion:
If you have video editing software that you know how to use - use it.
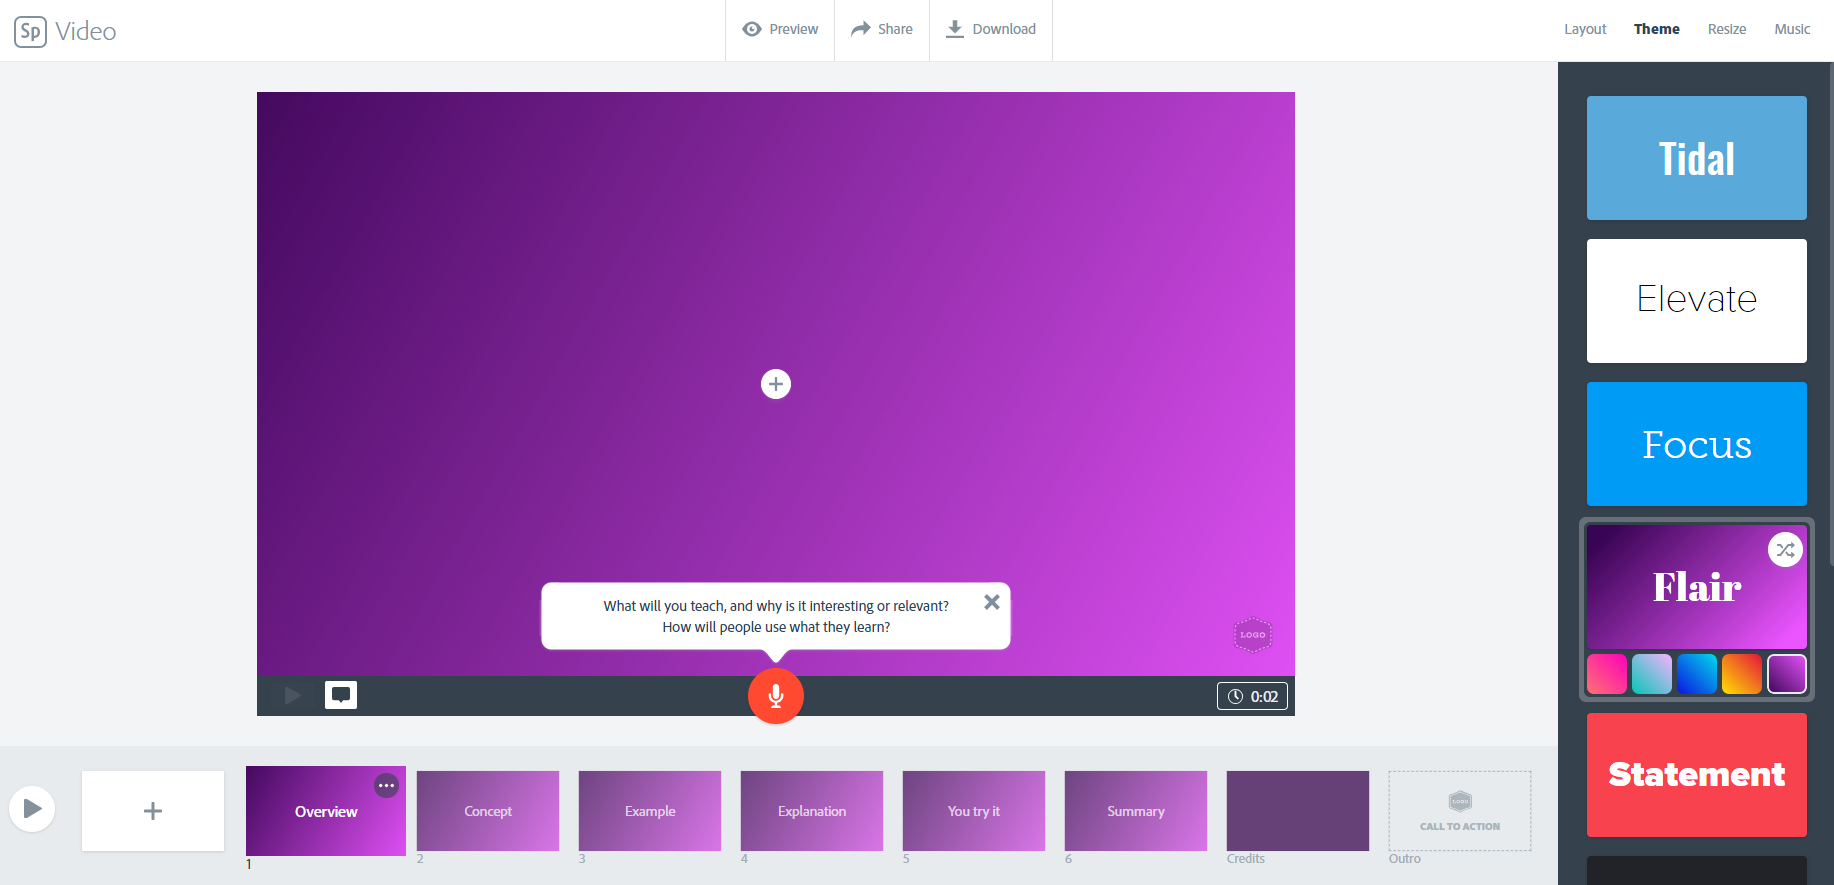
If you have nothing available at all and are really new to this - Use Adobe Spark Video or emaze.
If just reading this has stressed you out, aim to complete a script and storyboard only.
Now Let's Talk Audio.
Audio can make or break your explainer video. Period. Having said that you don't have to invest in a pro microphone to create an explainer video. You do need something more than the on-board microphone on your laptop. You need good enough audio - good enough to not distract from your explaining. Here are the three microphones I've used.
Cheapest option - A decent headphone microphone. Priced from as low as 25.00. Not perfect but gets the job done.
Blue Snowball Ice - 70-ish
Blue Yeti - 140-ish
For audio editing you can use Audacity (free for Mac and PC) and the export the audio to your video editing software.
Here's a video that compares some of the less expensive mics.
In addition tot he microphone you'll need a quiet pace to record.
True story: When I was working with a fast food chain, their training director was doing the voice overs (she had a great voice). The first few audio files she sent were really awful. She sounded like she was underwater. This kind of echo is really annoying and you can't edit it out in post. Long story short, she ended up recording all the audio (for 18 explainer videos) in her closet. Closets are great little sound booths 'cos clothes are soft and they absorb sound (no bounce, no echo).
Also, listen for noises that you have become ear-blind to like your furnace, outside traffic, and the neighbors dog.
And that is about it for technical requirement. And again, if you gave set a learning goal to complete an explainer video plan, script, and storyboard, save this section and work through the options above and production process in your own time.
Let's move on to the course outline.