Activity Pack: Explainer Videos
| Site: | SCoPE - BCcampus Learning + Teaching |
| Group: | FLO MicroCourse: Create an explainer video OER |
| Book: | Activity Pack: Explainer Videos |
| Printed by: | Guest user |
| Date: | Monday, 16 February 2026, 7:04 AM |
Description
This book includes resources, readings, videos and instructions for completing this micro-course.
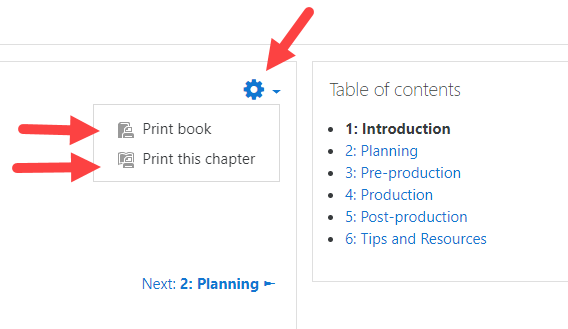
I've created this in a book format so you can save it as a .pdf for future reference.
There are 6 chapters, one for each step (or day) of the course plus a bonus chapter with additional resources and examples.
See you inside :-)
Hello and welcome!
I'm Jamie Billingham and I'll be one of your guides on the side for the next week.
I've been creating explainer videos for a few years now and my appreciation for them has only gotten stronger. My first explainer video was for a tech start-up and since then I've produced dozens of short and long form explainer videos for a variety of organizations, including non-profits, restaurant chains, and of course educational institutions. Currently, I'm an instructional designer (term) at the JIBC, Fire and Safety Division.
Enough about me - how about you?
In designing this micro-course I had to make some assumption about who you would be, what you would already know, and most importantly, what you came here to find out about. These are the assumptions (the A in ADDIE sometimes mean analysis by assumption, right?):
1. You are amazing, wickedly smart, and tolerant of typos :-)
2. You are super busy
3. You are either comfortable with new technology or you are brave enough to give new technology a try
4. Related to #2 - you read faster than I can speak
- The whole course (except the forum) is in one book so that you can download it and save it as a .pdf. (See below) Don't be fooled by the "print" part. It will download (or open in new window) and you can save it as a .pdf, or print if you really must.
- I have only spell-checked once - cos I an buzy to
- I've included lots of technology options and examples (maybe too many - oh, dear)
- I have not used video for instructions or basic information
Ok, on with the show.
Let's spend a few minutes on expectations - yours and mine - beginning with learning objectives.
I'm using the term learning objectives pretty loosely here. These are more like my hopes for you and this micro-course.
I hope that by the end of the course (or at some point after you make you way through the .pdf you have downloaded) you will be able to:
1. Recognize the different types and styles of explainer videos
2. Critically analyze different types and styles of explainer videos based on Mayer's Principles of Multimedia Design or your own good taste
3. Draft a plan, a script, and a storyboard.
4. Create your own explainer video using the four-step process described and demonstrated in this course or a process of your own design
My real hope is that you'll create your own learning objectives/outcomes/goals.
Realistically, in an hour or a day, for five days, most of you ought to be able to get through #3.
#4 is going to be tough unless you have a really good handle on the technology.
Speaking of technology, let's move on to the technical requirements.
First - If you have set your learning goal or objective to create a plan, script, and/or storyboard, you should just save this chapter - tuck it away and come back to it next week or whenever you are ready for it. You do not need any special tech to plan, script or storyboard. You just need ideas and a way to capture them.
To complete your planning, scripting, and story-boarding you'll only need a way to write and something to write on. Pen/paper, post-its, index cards, word processor, Google docs, or if you want to get fancy, PowerPoint (or equivalent).
Second - If you plan to complete an explainer video this week, you probably have all that you need, in the tech department.
If you have accessed this course on a smart phone, tablet, laptop, or desktop computer (PC or Mac) you have the technology required to produce an explainer video.
Ok, maybe if you are on a desktop machine with no microphone, you may have some troubles. But even that can be worked around.
Basic Requirements to Produce a Video
You will need:
1. Some kind of video editing or production software (I'm including apps in this). This is where it gets kind of confusing. Its confusing because there are sooooo many options.
2. A way to record audio and get it into your video editing software or app. A smart phone that has the ability to record audio might do. The only challenge with this option is exporting the audio in a format that you can upload to your video editing software. In many cases the software you will use to edit your video will have a way to record directly into it. The challenge with this is that the audio quality may not be great. You can produce a perfectly usable explainer video without audio but its a lot more work and may not be as effective.
2a. Ideally, a microphone that works with the choice you make in 2.
Video Options
This is FREE (upgrades available) and has versions for a variety of devices (cloud app or iOS). Its a great option although there is a wee bit of a learning curve. But there are lots of how-to videos too.
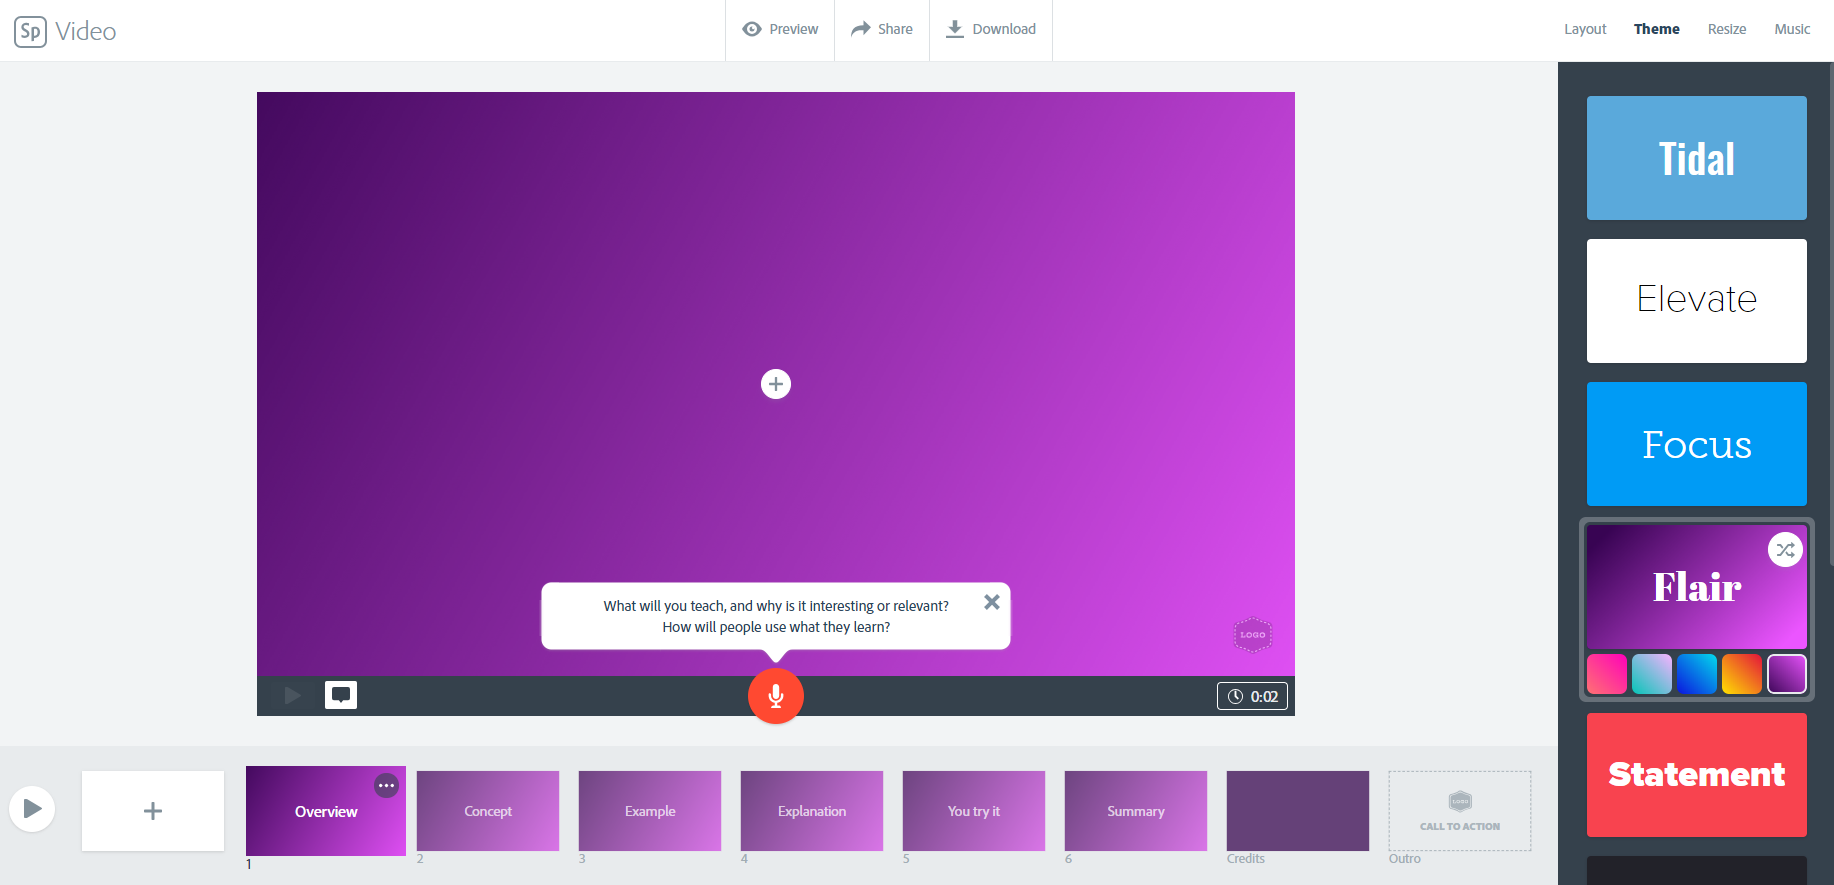
On the desktop version you'll need to add a microphone, but that's about it.
The downside of this option is you don't have as much control over the look and feel.
Similar options include:
Animoto: Animoto has been around for a very long time. You can try it for free (for 14 days) and there are paid subscriptions. The education versions are free so if you like it and have a school email address you can apply for a free classroom account. It allows more control, has fewer templates, but narration is a bit trickier.
emaze: Free and paid plans. Technically "presentation software" but works for explainer videos. If you choose this option here is a how to add audio tutorial. https://youtu.be/Ou9bQ7sb07o
Powtoon: You can create a free video that is up to 3 minutes long. Here's how to add a voice-over to a Powtoon. https://support.powtoon.com/en/article/adding-a-voiceover-to-your-powtoon
VideoScribe: This is a really nicely designed white-boarding app. It is not free but there is 7 day free trial. Narration is a bit more difficult (here's how http://help.videoscribe.co/support/solutions/articles/1000033726-record-a-voiceover) with VideoScibe - I've used it a lot by exporting the animation and syncing up the video and audio in Camtasia.
2D and 3D Animation Apps
CAUTION: These animation apps do a great job of animating people. The result of this is a cartoon styles talking head video. If you choose one of these may have to get a bit more creative, to stay within the explainer video genre.
Vyond (formerly GoAnimate): Free trail. It's pricey to purchase but does allow you to sync your cartoon self to the narration.
Moovely: If you have an "education" email you can get a free version. Like Vyond, Animaker, Raw Shorts, and Plotagon, Movely lets you create animated cartoon that talk.
Animaker: Less expensive than some others but I am not sure how to access a free trial or if they offer anything other than bulk buys for educators.
Raw Shorts: The techiest option - Use artificial intelligence to create your explainer videos. How cool is that! They have a free trial.
Plotagon: I have a soft spot for Plotagon. Their 3D animation software is pretty easy to use and they do have a free version Plotagon Story available for iOS and Android. I have the free Story version on my Mac and PC also - no idea how I did that though :-/
Or....
The options above are all variations of animation, whiteboard, and video production apps. Yet another option is to use the video editing software that probably came with your preferred device - Mac has iMovie, most PCs come loaded a Windows version that includes movie editing software, and your tablet or mobile device could have something usable, or a low cost app may be lurking around your screen, forgotten and unnoticed.
If you are techie type, you may have some kind of dedicated video editing software already - Camtasia is my personal favorite and of course Adobe Premiere Pro and After Effects are truly cool, but have a considerable learning curve and cost.
The Paradox of Choice
Choices! I know. Here is the conundrum. If I tell you which one to use, you may not have the option available. But, in providing so many options I have created an environment where analysis paralysis could take hold. What to do?
Here is my suggestion:
If you have video editing software that you know how to use - use it.
If you have nothing available at all and are really new to this - Use Adobe Spark Video or emaze.
If just reading this has stressed you out, aim to complete a script and storyboard only.
Now Let's Talk Audio.
Audio can make or break your explainer video. Period. Having said that you don't have to invest in a pro microphone to create an explainer video. You do need something more than the on-board microphone on your laptop. You need good enough audio - good enough to not distract from your explaining. Here are the three microphones I've used.
Cheapest option - A decent headphone microphone. Priced from as low as 25.00. Not perfect but gets the job done.
Blue Snowball Ice - 70-ish
Blue Yeti - 140-ish
For audio editing you can use Audacity (free for Mac and PC) and the export the audio to your video editing software.
Here's a video that compares some of the less expensive mics.
In addition tot he microphone you'll need a quiet pace to record.
True story: When I was working with a fast food chain, their training director was doing the voice overs (she had a great voice). The first few audio files she sent were really awful. She sounded like she was underwater. This kind of echo is really annoying and you can't edit it out in post. Long story short, she ended up recording all the audio (for 18 explainer videos) in her closet. Closets are great little sound booths 'cos clothes are soft and they absorb sound (no bounce, no echo).
Also, listen for noises that you have become ear-blind to like your furnace, outside traffic, and the neighbors dog.
And that is about it for technical requirement. And again, if you gave set a learning goal to complete an explainer video plan, script, and storyboard, save this section and work through the options above and production process in your own time.
Let's move on to the course outline.
Ok, down to the nitty-gritty, finally.
Here's how this is going to roll out.
There are six chapters in this book. You should skim through all six before beginning. You should do that because I have been too lazy to not included an advance organizer or any other kind of fancy instructional design element that will allow you to see the whole big picture and contextual thing. So, skim through now - I'll wait.
You skimmed, right? I'm trusting you here.
As you can see, the course is laid out in the following order.
Chapter 1: Introduction (day 1)
This is where you are now so I'm not going to explain it to you :-)
Chapter 2: Planning (day 2)
In this chapter you'll watch a few videos (grab some popcorn for this but easy on the butter 'cos I'm on a diet) to get a better sense of the different types of explainer videos you could create. I'll be asking you to think about and note down what you liked or didn't like about the videos. I'll also be asking you to begin to make some choices around:
- Your video topic
- Who your audience is
- What you want them to learn from your video
- The style, model, and medium you might use
With those choices made I'll ask you to use one of the many templates provided (or your own) to produce your plan (aka outline)
Chapter 3: Pre-production (day 3)
In this step you'll:
- Write your script based on your plan - You’ll need a script even if you aren’t narrating your video. If you don’t narrate then you’ll provide text (maybe animated or kinetic) on the screen. Pro tip - KEEP THIS SHORT. 1 Minute of Video Time = about 140-160 words of script. So, a two-minute video could have a script that has up to 320 words.
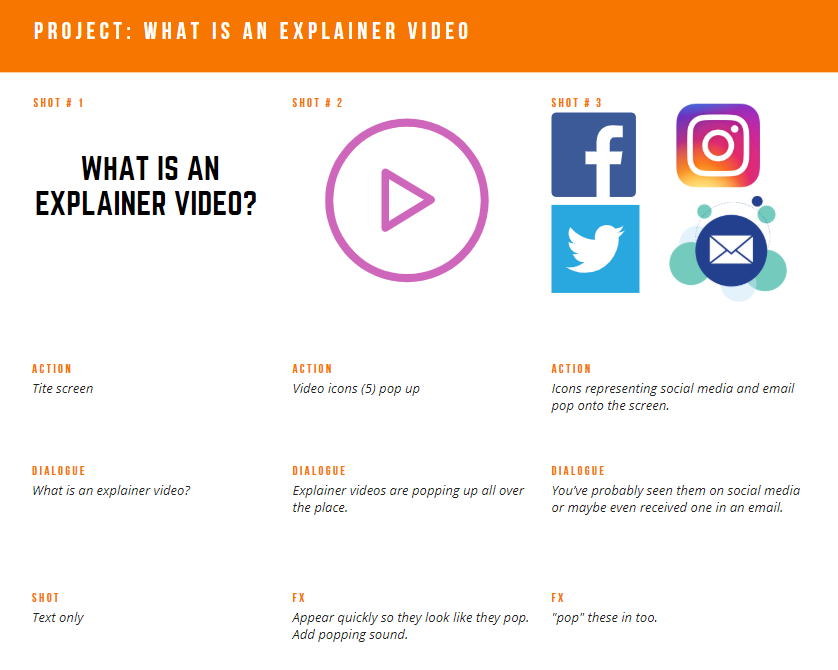
- Create a storyboard (pen/paper, ppt) - This is kind of like a lesson plan and will include your script along with rough indications of visuals and any animation you'll be using. Pro-tip - You can write your script and storyboard at the same time.
- Find or create your visuals. These can be photos and/or graphics and/or video clips. I'll include a list of sources for these, in the chapter.
- Choose music and sound effects (if you are using). I'll also include a list of sources for these, in the chapter.
Chapter 4: Production (day 4)
Depending on your learning goal:
Share your script and storyboard in the forum.
Or
1. Record or create your video and audio
2. Record any other video you plan to add
Chapter 5: Post-production (day 5)
Depending on your learning goal:
Provide feedback to your co-learners.
Or
Put it all together. Your recorded audio, your visuals, additional sound effects or music all get pulled into you editing software and you line up the narration, visuals, sounds, and animations. Pro- tip - a one minute video takes from 1 - 4 hours in post, depending on the complexity of animation and how well the narration lines up with the visuals.
Do not feel bad if you don't get to this part during this course. I'm hoping you set a realistic goal of maybe getting through to the script writing step.
If you do produce an explainer video - please share it in the forum
so we can give you the accolades you clearly deserve!
Now you know where we are going and have a good idea how we will get there. Go on to the Foundation chapter.
Before jumping into explainer video planning, let's spend a few minutes defining exactly what we mean by "explainer video".
What is an Explainer Video?
The folks over at CommonCraft (arguably the most well known explainer video producers) suggest that explainer videos are:
"... short, animated videos with a specific goal: understanding. They use clear and concise language along with entertaining and useful visuals. The video format can serve as a near-perfect package for presenting ideas, products and services in a form that not only explains, but attracts attention." (Source)
Explainer videos help you understand something. That something is usually a concept, idea, or process. A how-to video is a cousin of explainer videos. A how-to video helps you do something while an explainer video helps you understand something. Having said that, there is a bit of grey area in between and I for one will not fault anyone for calling a how-to video an explainer video or vice versa.
In the planning stage you should identify the type of video you are aiming for. Will you be helping your audience understand an idea or will you be helping them understand how to do something more tangible?
What is Your Intention?
One thing that should be considered in that the intent of the explainer video makes a difference. The intention can be educational or marketing - to teach or to sell. In this micro-course we'll focus on educational explainer videos. The 4 step process of planning, pre-production, production, and post-production is the same for both. The differences are:
1. the intent (educating or marketing), and
2. the ideal length.
For marketing purposes, an explainer video should not be longer than 3 minutes and even that is stretching it - 90 seconds seems to be the sweet spot.
For educational explainer videos you have a bit more leeway and the current thinking is that you can go up to about 10 minutes. Anything over 5 minutes had better be super cool and interesting though!
A foundation
Finally, let's take a look at an educational explainer video example that offers an explanation of Mayer's Principles of Multimedia Design. These principles provide a solid foundation to guide your explainer video creation process. After you watch the video feel free to head over to the forum and say hello and post any thoughts you have so far :-)
Mayer's Theory of Multimedia Learning - Dr. Kacz
https://youtu.be/0aq2P0DZqEI
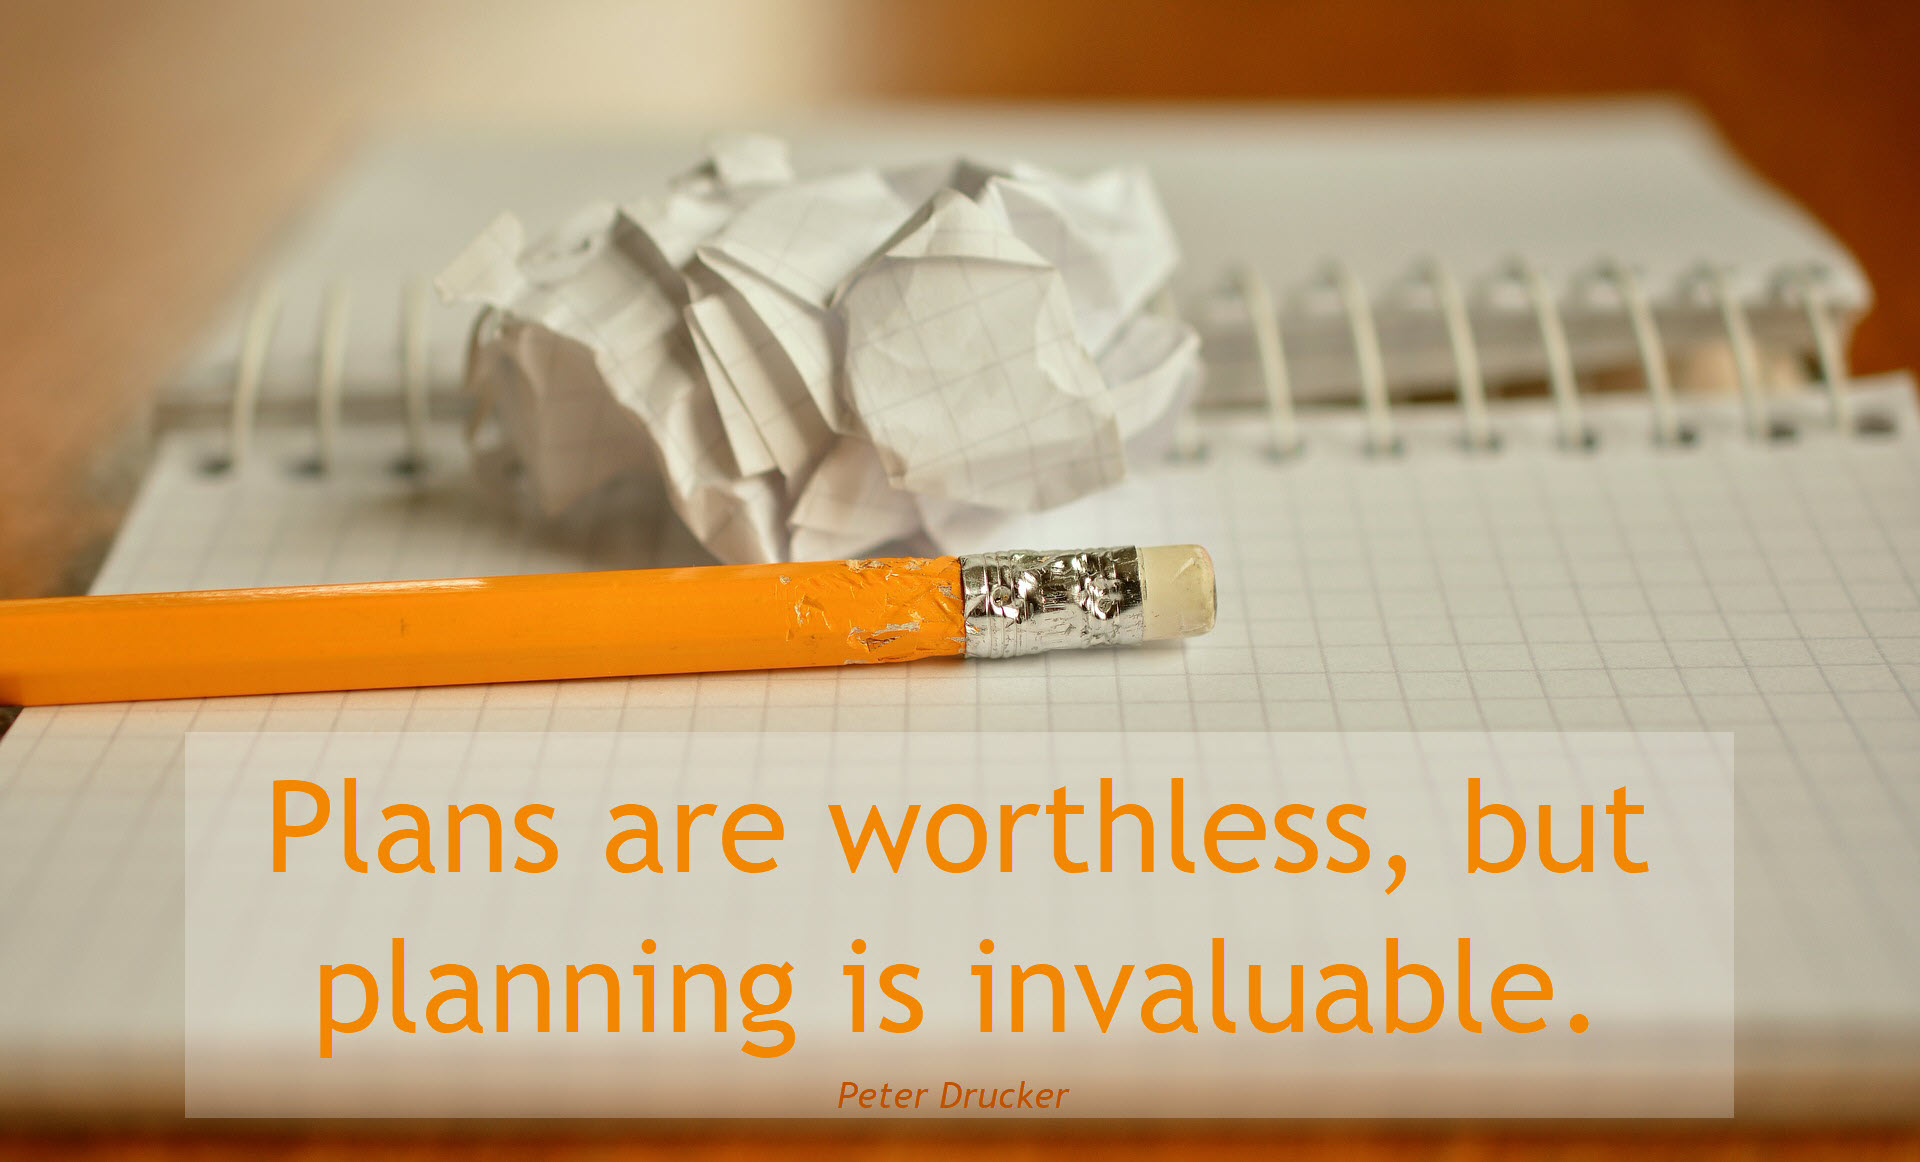
Image source: congerdesign via Pixabay
There are so many great quotes about planning. My favorite is from Peter Drucker who clearly understood that it is the process of planning that has value. The end result is not the plan, rather the end result should be the execution of the the plan. The plan is the box, the planning is the goodies inside. With that in mind, here is one way to go about planning your explainer video.
Before going one step further answer the following questions.
1. What is you topic? What are you going to explain in your video? Pro-tip: Choose something you know a lot about.
2. Who is your audience? Who are you creating this video for? What are your assumptions about your audience?
3. What do you want them to take away from this video? What is the learning goal or objective?
4. What are the 1 - 3 BIG ideas that you will include in this video?
5. How long will you video be? How many minutes and how many words? 1 minute of narration = approximately 150 words.
How Change Works
https://youtu.be/wPKPQNq59so
1. What is you topic? What are you going to explain in your video?
2. Who is your audience? Who are you creating this video for? What are your assumptions about your audience?
Non-profit housing staff that may not understand the normal process of change.
3. What do you want them to take away from this video? What is the learning goal or objective?
4. What are the 1 - 3 BIG ideas that you will include in this video?
5. How long will your video be? ~ 150 words per minute if you are narrating.
With is part complete the next step is to decide on a model or template.
Explainer Video Models
Like movies, explainer videos can be grouped into categories or models. There is no real hard and fast rule around this but there are some models that can be used to help structure your video. The most common of these is probably the story model. In marketing these are the pain point model. In education these can be cautionary tales or hero stories.
Check out the videos below. The first is a short explainer video of sorts that features live action (that makes it more of an educational video than explainer video but lets not get too caught up in semantics :-O ) and humorous explanation of some common story models aka shapes.
Kurt Vonnegut on the Shapes of Stories
https://youtu.be/oP3c1h8v2ZQ
These two Meet Bob videos are marketing type explainer videos but do a good job of showing how different approaches can work.
Make note of what you like or don't like about each.
Meet Bob 1
https://youtu.be/yMhDB9nJnUY
Meet Bob 2
https://vimeo.com/248212133
The Analogy Model
The story model is the most common or at least the most recognizable form of explainer video. Another well known and effective model is the analogy. Analogies are great ways to to explain complex ideas.
Here's an article about using analogies and a sample video showing how the folks at CommonCraft use an analogy to explain social media.
How to explain pixels with an analogy: https://explaineracademy.com/blog/2883/how-to-explain-pixels-with-an-analogy
Social Media in Plain English
https://youtu.be/MpIOClX1jPE
Old Way/New Way Model
This is also an effective way to convince and explain.
What is Pinterest?
https://youtu.be/oJzD4vF5dFA
Steps Model
Lastly, here is an example of an explainer video that walks the audience through steps to do something. This would one of the grey area videos that is part how-to and part explainer. (This video will only be available for the duration of this course.)
Termination Next Steps
https://youtu.be/23O2OBF82q4
Explainer Video Planning with Worksheets
Building on the Q&A approach shown (way) above, here are some worksheets to help further develop your explainer videos. I've found that following a planning pathway helps ensure you have all the information you need before jumping into scripting. You are all brilliant and creative adults so you can, of course, just jump in without any planning :-O or use your own planning process.
The worksheets include the basic questions about your topic and audience plus questions that will help you write the script for your explainer video.
Click on the links below to download the worksheets in word (.docx) format.
Explainer Video Worksheet 1: Basic Outline
Explainer Video Worksheet 2: Story Model Outline
Explainer Video Worksheet 3: Analogy Model Outline
Explainer Video Worksheet 4: Old way/New way Model Outline
Explainer Video Worksheet 5: Steps Model Outline

Your Mission
Your mission, should you choose to accept it, is to complete one of the worksheets above and post it (or your very strong feelings about this process) to the forum.
Ok, at least share the basics:
1. What is you topic? What are you going to explain in your video? Pro-tip: Choose something you know a lot about.
2. Who is your audience? Who are you creating this video for? What are your assumptions about your audience?
3. What do you want them to take away from this video? What is the learning goal or objective?
4. What are the 1 - 3 BIG ideas that you will include in this video?
5. How long will you video be? How many minutes and how many words? 1 minute of narration = approximately 150 words.
Welcome to the wonderful world of pre-production! There's a lot to do in this stage so let's get to it!
Here's what you'll be doing in pre-production:
- Choose a medium
- Write your script
- Create a storyboard
Choose Your Medium
Remember back in the introduction when I overwhelmed you with technical requirements - well, we are back at that point again. You can use what you have - if you have something like Camtasia, or iMovie, or any video editing software or app, use that. If not, or if you just want to play with a new tech toy, here (again) are some options.
Video Options
Adobe Spark Video: This is FREE (upgrades available) and has versions for a variety of devices (cloud app or iOS). Its a great option although there is a wee bit of a learning curve. But there are lots of how-to videos too.
Animoto: Animoto has been around for a very long time. You can try it for free (for 14 days) and there are paid subscriptions. The education versions are free so if you like it and have a school email address you can apply for a free classroom account. It allows more control, has fewer templates, and narration is trickier.
emaze: Free and paid plans. Technically "presentation software" but works for explainer videos. If you choose this option here is a how to add audio tutorial. https://youtu.be/Ou9bQ7sb07o
Powtoon: You can create a free video that is up to 3 minutes long. Here's how to add a voice-over to a Powtoon. https://support.powtoon.com/en/article/adding-a-voiceover-to-your-powtoon
VideoScribe: This is a really nicely designed white-boarding app. It is not free but there is 7 day free trial. Narration is a bit more difficult with VideoScibe. (Here's how http://help.videoscribe.co/support/solutions/articles/1000033726-record-a-voiceover) - I've used it extensively by exporting the animation and syncing up the video and audio in Camtasia.
2D and 3D Animation Options
Vyond (formerly GoAnimate): Free trail. It's pricey to purchase but does allow you to sync up you cartoon self to the narration.
Moovely: If you have an "education" email you can get a free version. Like Vyond, Animakerm Raw Shorts, and Plotagon, Movely lets you create animated cartoon that talk.
Animaker: Less expensive than some others but I am not sure how to access a free trial or if they offer anything other than bulk buys for educators.
Raw Shorts: The techiest option - Use artificial intelligence to create your explainer videos. How cool is that! They have a free trial.
Plotagon: I have a soft spot for Plotagon. Their 3D animation software is pretty easy to use and they do have a free version Plotagon Story available for iOS and Android. I have the free Story version on my Mac and PC also - no idea how I did that though :-/
Choose this now so you can write your script and storyboard in a way that will work with the technology. For example, Spark has some restrictions around length of narration per slide.Write Your Script
Now, with your medium decided upon and your planning done (either using the templates provided or your own process) you can write your script.
Remember 150 words should give you about a minute of narration.
Once you have your draft script written:

Big pro-tip here - Be prepared to KILL YOUR DARLINGS. So sayeth the King.
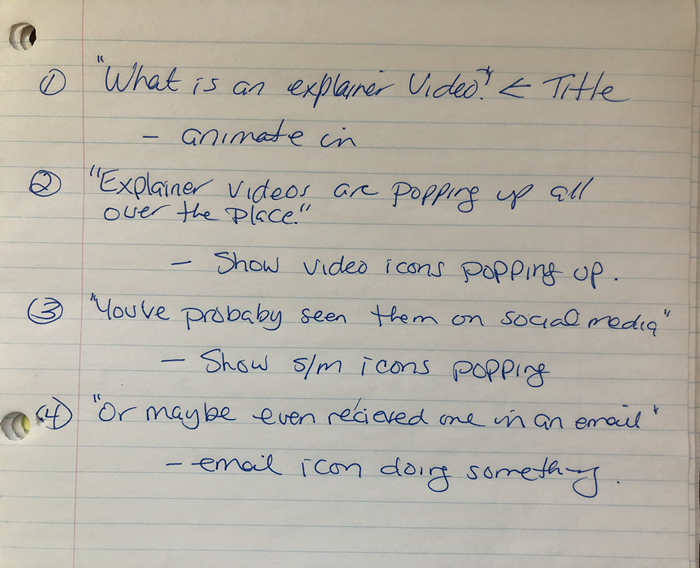
Sample 1 Minute Script (sans darlings)
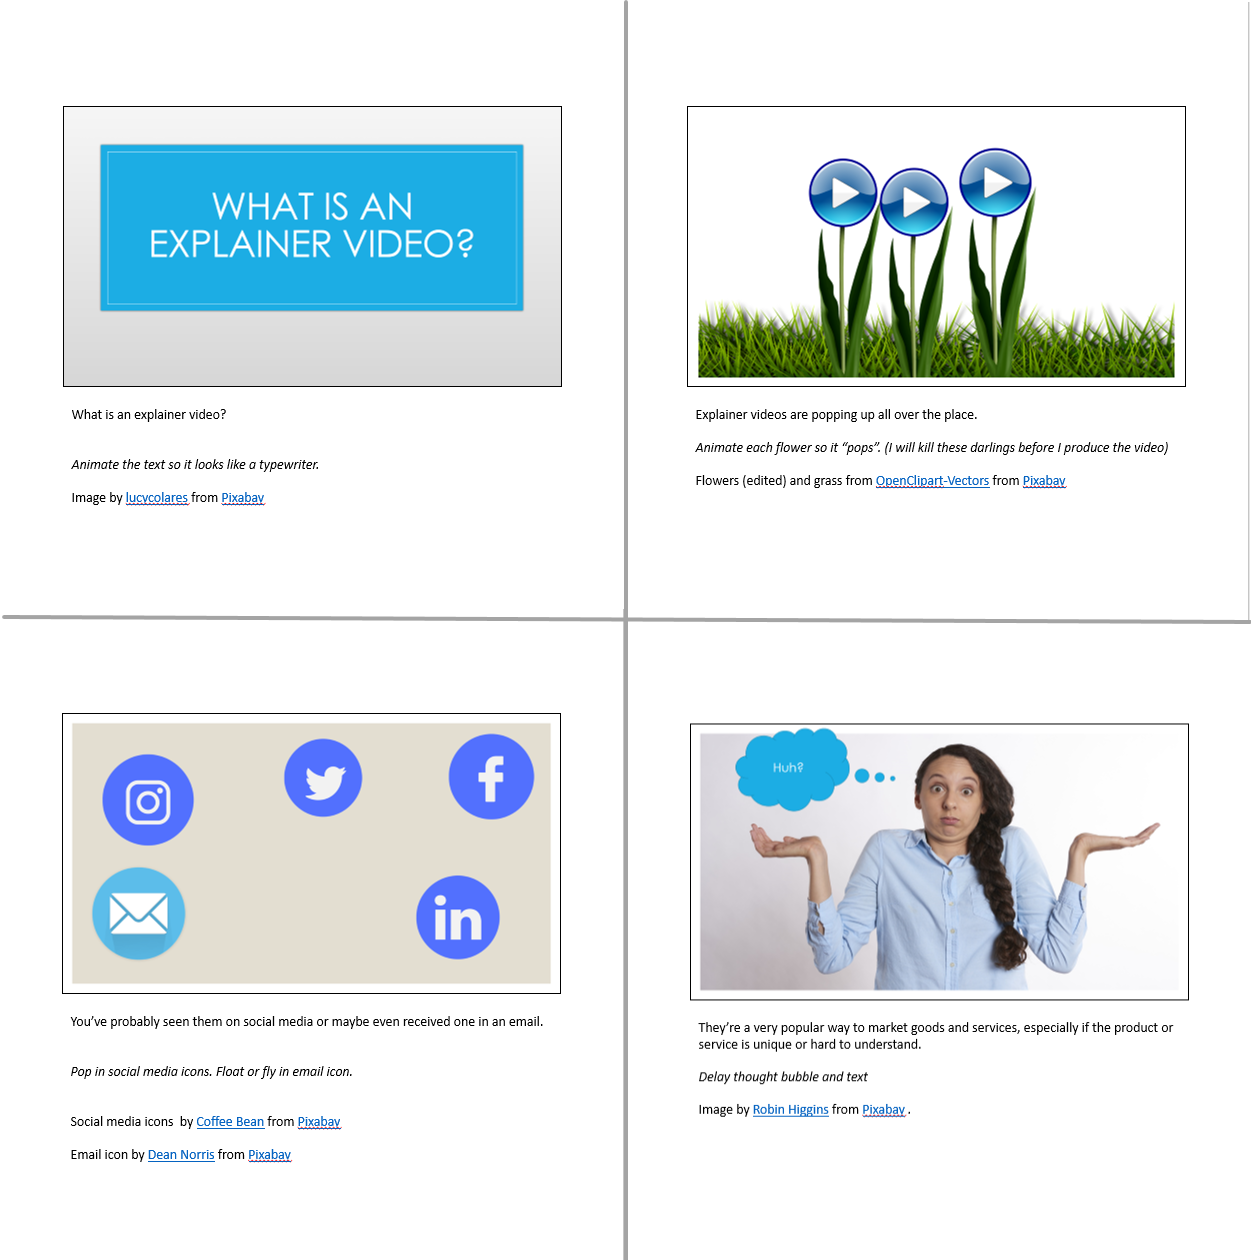
What is an explainer video?
Explainer videos are popping up all over the place. You’ve probably seen them on social media or maybe even received one in an email.
They’re a very popular way to market goods and services, especially if the product or service is new or hard to understand.
In education and training, explainer videos make an excellent addition to online courses or flipped classrooms.
So what exactly are they?
Explainer videos are short, informative, and (hopefully) interesting videos that aim to help a targeted audience understand something.
That something is usually an idea, concept or process that people may struggle with.
Or it may explain something that’s important to have a common understanding of.
To make them interesting some kind of animation, combined with narration or voice-over, is usually used.
One of my favorite ways to use explainer videos is to place them near the beginning of a course, to lay a foundation of understanding that can be built on.
So, now you know that explainer videos are short, informative, interesting and usually include animations and a voice-over.
You also know that they are produced for a specific group of people and the intent is to help that group understand something.
204 words
I wrote this script pretty quickly - maybe 5 minutes - but spent more than twice that time reading it out loud and editing it.
If you are comfortable doing so, share your script or storyboard in the forum :-)
We are down to the wire here folks!
In this stage you'll record your voice-over script and make some final choices around using sounds, music, or even other video clips.
Recording Your Script
How you record will depend on what you have available. Use the best microphone you have access to. If you have the capacity to record into audio editing software like Audacity your finished product will be way better than if you record directly into your video editing software.
Here's an Audacity tutorial, just in case you want to try it.
How to Record and Edit in Audacity - Beginner Tutorial
https://youtu.be/fshLRl3GWqE
Audio Recording Tips
Here are a few tips that will help you rock your audio regardless of your software choices.
1. Follow the script - ad-libbing rarely works out. If you find you have missed something in your script - re-write the script.
2. Record somewhere quiet and with soft surfaces - in other words the living room is probably better than the kitchen. The bedroom is better than the bathroom.
3. Listen for noises you have become deaf to. Heating systems, airplanes overhead, your kids fighting over the remote, the sound of your computer (desktop PCs are the worst for adding background noise). Shut off what you can, bribe the rest with treats.
4. If you are using editing software (like Camtasia for example), speak a bit slower than you normally do, with lots of space between sentences. When you get to post you can speed the audio track up slightly and remove any spaces you don't need.
5. Enunciate and inflect - but not too much. Most of us "listen" with our eyes as much as our ears, so to make up for that you'll want to add more inflections than you would in a normal conversation. If you have a habit of slurring some words or sounds, try to enunciate a bit more.
6. Read your script - out loud - several times before recording.
7. Plan to record several times and keep the best one.
For a few more pro tips check out this great post The Complete Guide to Doing Voice Overs Like a Pro https://www.techsmith.com/blog/voice-over/
Adding Sounds and Music
These are totally optional but it would be remiss not to at least mention these. It would be equally remiss to not include a stern warning that these may only be used if they do not distract from the explaining part.In the production stage decide on the tracks or sounds you will use and if they need any editing themselves, do it now.
Once you have your audio recorded and graphics ready - off to post you go!
This is is where you put it all together.
If you are using an app like Adobe Spark you may have to add the audio and graphics as you go, so the lines between production and post-production are kind of blurry. Using an app like Spark or emaze will be way less time consuming than using editing software like Camtasia.
Speaking of - Here is my Adobe Spark demo. It was really fast to produce - under an hour - despite having to restart my computer many times. I'm not sure if the app is glitchy or if it was my wifi connection or what but I did get error messages several times and had to re-start my machine to get the app to work.
The good news is that despite the restarted it saved everything, every time. I don't think this is good as it could be but it kind of gets the job done, right in your browser - so no extra tech tools required (except the mic). I'll post the one I do in Camtasia, in the final forum.
If you are using a more traditional method of video production you'll be importing your audio and graphics into your software and editing the two together there. In my experience you should plan to spend between 1- 4 hours per minute, in post-production.
To give you an idea what that process looks like here's a how-to tutorial (not an explainer video) on how to edit in Camtasia.
You can use Camtasia (or other video editors) to create simple and effective animations. You can also use screen recording software (like Camtasia) to record your screen while you play a PowerPoint that you have added animation to.
In general, if you are creating a video that you can and will use for a long time, spend the extra time in an editing suite. If it's a one-off, go with an app. Whatever software or app you decide to use you'll probably be able to find loads of how-to tutorials.
Go forth and edit your video.

Made by ColleenCrouch
Here are a few extra resources and examples.
Tips and Tricks for Educational Video Creation - Pitt Online
https://teaching.pitt.edu/resources-for-teaching/video/
How the BBC makes amazing 3 minites explainer videos?
2007 CommonCraft first explainer video - RSS in Plain English
https://youtu.be/0klgLsSxGsU
CommonCraft latest explainer video https://www.commoncraft.com/video/flowcharts
This Is a Generic Brand Video, by Dissolve
https://youtu.be/2YBtspm8j8M
This Incredible Animation Shows How Deep The Ocean Really Is. Animated, narrated with captions.
https://youtu.be/UwVNkfCov1k
Readability Calculator https://www.online-utility.org/english/readability_test_and_improve.jsp
Feynman Technique (How to know if you know enough about a topic)
https://youtu.be/tkm0TNFzIeg
Upgoer Five Text Editor http://splasho.com/upgoer5/
Make Kinetic Typography in PowerPoint
The Definitive Guide to Explainer Videos https://breadnbeyond.com/explainer-video/