Blackboard CollaborateIf you're new to Blackboard Collaborate, here's a brief checklist:
You can also expolore these current tutorials for Moderators - You will automatically have moderator access to the instance of Blackboard Collaborate we use in FLO Design. You are welcome to use the tool to schedule synchronous sessions with your team member(s). Just post a notice in the Open Forum as to when and how long you'll be using the room (we only have one so it's shared). Be careful when you're part of a Collaborate session - if you start pressing buttons to explore while someone is presenting, you can really mix things up! The most useful collection of information will probably be in the Getting Started tutorials. |
Drawing Tools 11. Draw.io (https://www.draw.io/)
How to: Draw.io in 82 seconds - (actually 1:26) 10 Tips for using draw.io - (3.48) |
Drawing Tools 22. Google Draw
Tutorials:
|
Drawing Tools 33. Microsoft Powerpoint (drawing tools)
Help docs |
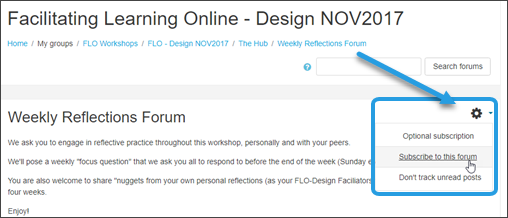
How can I manage all the emails from the workshop?Some forums in this workshop are set to send you emails of each posting to keep you connected to what's going on in the course throughout each day (e.g., Announcements). Other forums are set to "Optional subscription". You can choose to subscribe to the forum if you want to be informed whenever something is posted. How to subscribe to a forum:Open the discussion forum and look for the small "wheel" or "gear" icon in the top right hand corner of the forum. Click on the gear and select "Subscribe to this forum".
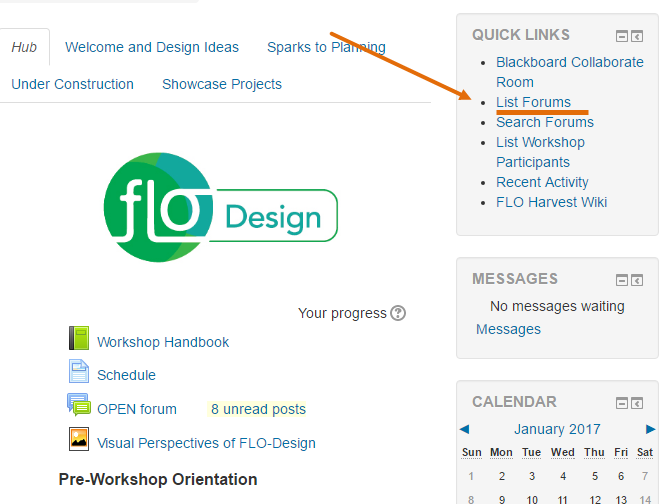
How to manage the emails from a subscribed forumNote: You can choose to "unsubscribe" from any forums (except an Announcements forum). We don't recommend this option as it's easy to fall behind or miss important events. Option 1:1. Look for the List of Forums in the Quick Links block
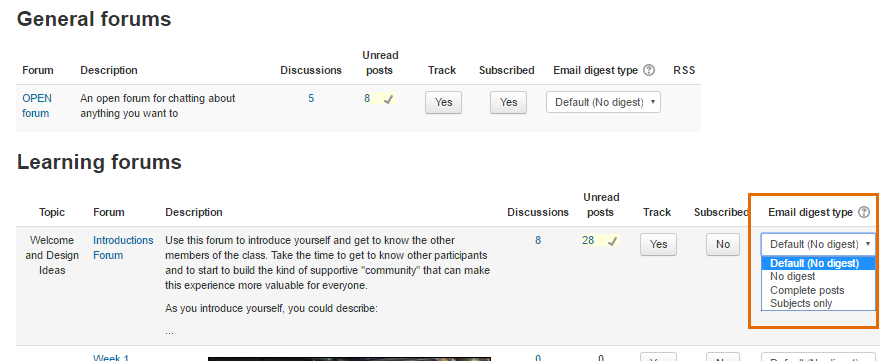
You can click on the drop-down arrow and select the option to receive a digest version from each forum.
Option 2:You can select to "Subscribe" (or "Unsubscribe") from all forums. You can also look for the Subscribed column and choose "Yes" or "No."
Option 3:Here's a brief video about how to set your email to manage the incoming emails from the workshop site. |

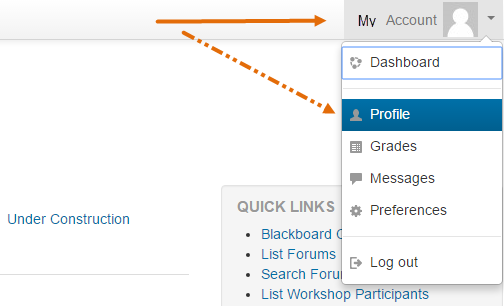
How do I add a photo to my profile?You can add a photo to your profile in two ways: from your Dashboard at the top of the course site or from the Administration block on the left side. Adding a photo from your Dashboard1. Click on your account link visible at the top right side of the screen. Select "Profile."
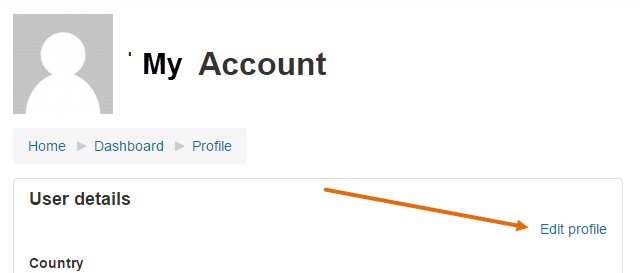
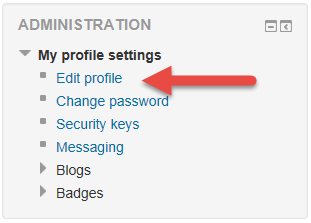
2. Select Edit profile from the User details area of the My Account page.
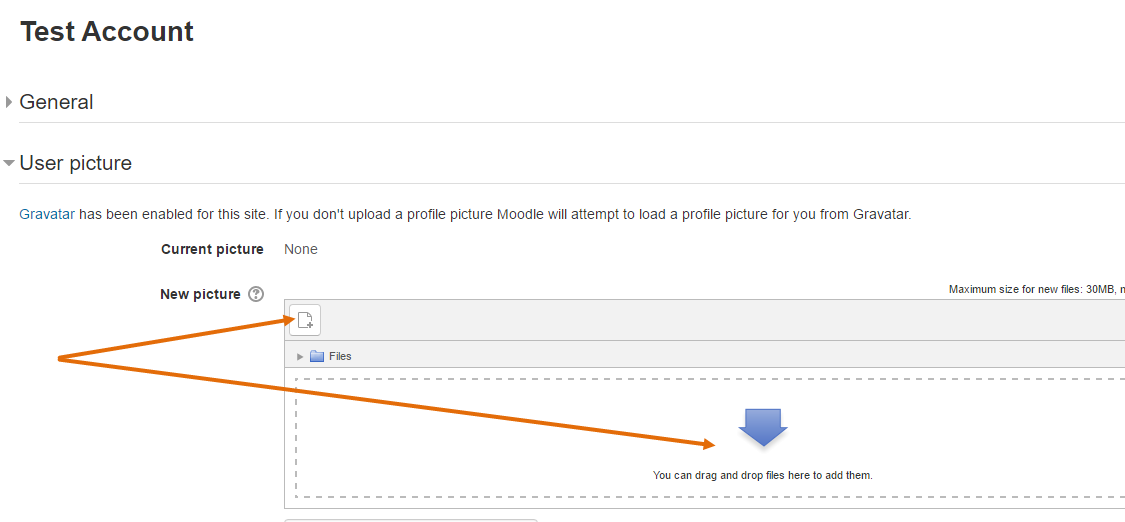
3. Look for the User picture section, following the General information section. Upload your profile picture by clicking on the icon or dragging and dropping it onto the upload area. Generally profile pics are resized to be 100x100 pixels - so try to make your image close to that size.
OR watch this great video from a former FLO participant. Adding a photo from the Administration blockWatch this Powtoon video: |
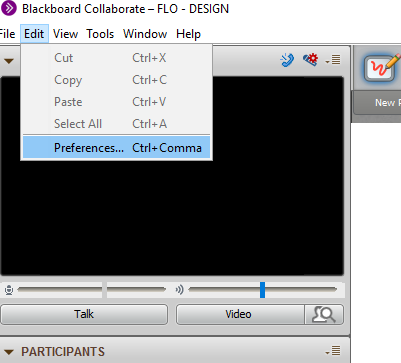
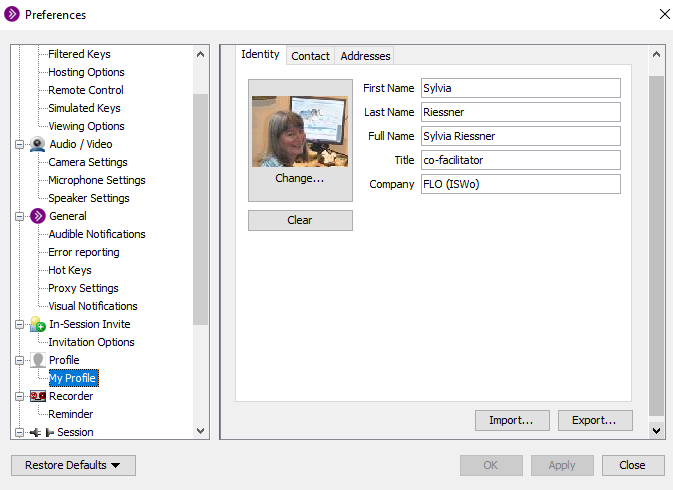
How do I add a profile picture in Blackboard Collaborate?If you have Moderator status in Blackboard Collaborate, you can add your own profile picture and details. 1. Find a clear picture of yourself - a head and shoulders shot. Resize it to 100 pixels by 100 pixels - if you're unable to do this, Collaborate auto-resizes to the required size. 2. Launch a Blackboard Collaborate session (from the link provided in your workshop - usually in the Quick Links block) 3. Click on the Edit menu and select "Preferences"
4. The Preferences window opens - look down the left for "Profile". Select "My Profile".
5. Click on Change button and upload your profile picture. |
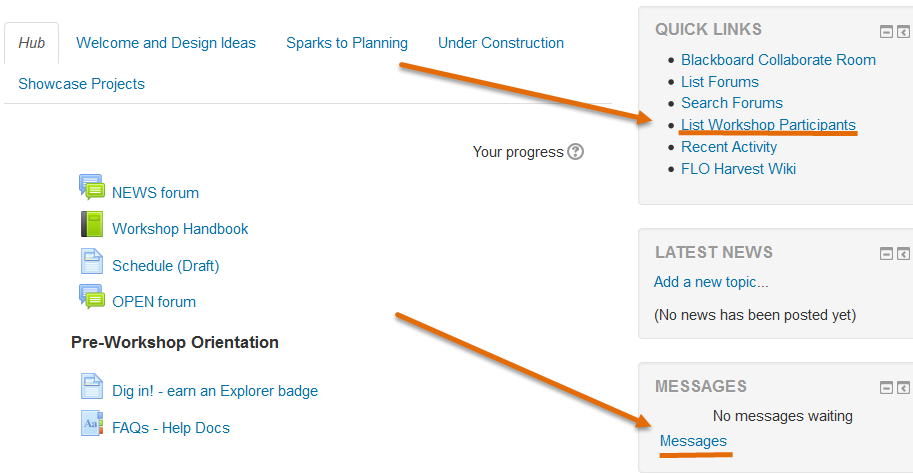
How do I contact a FLO Facilitator?You can contact a FLO Facilitator through the List of Workshop Participants OR by clicking on the Messages link in the Message block on the right side of the Hub page.
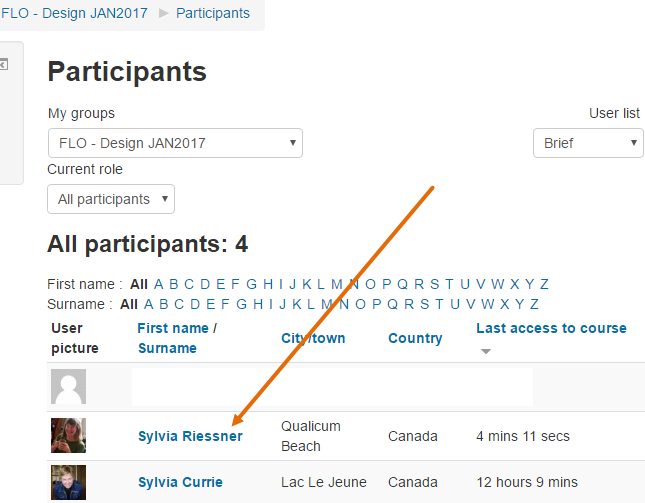
Method 1 - List of Workshop Participants1. Click on the List Workshop Participants page embedded in the Quick Links block on the Hub page. When the page opens, click on the name of one of the Facilitators.
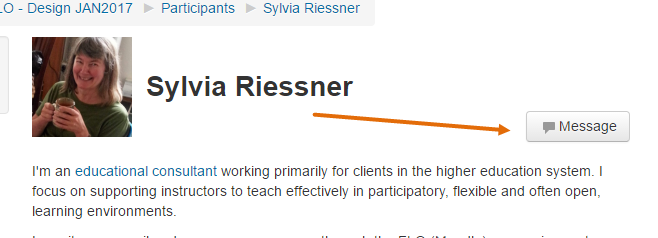
2. When the Facilitator profile page opens, look for the Message button to send a message.
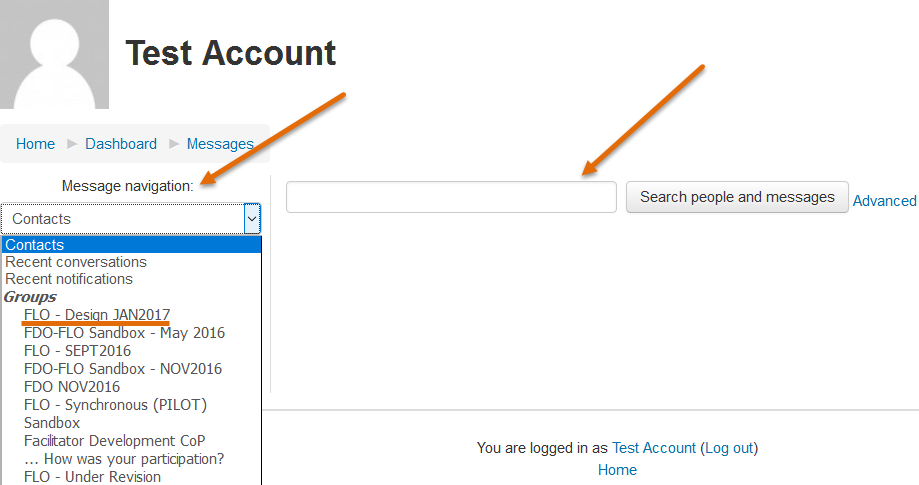
Method 2 - Use the Messages block1. Click on the Messages link in the Message block located on the right side of the Hub page. Once you are on the Messages page, you can search by name OR you can select the Group "FLO-Design JAN2017" from the drop-down menu under "Message navigation".
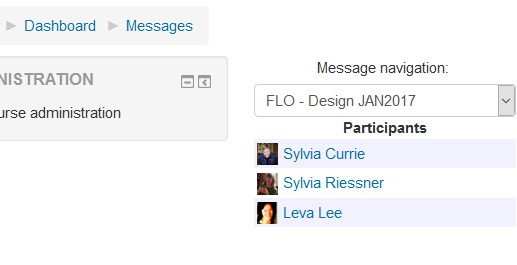
2. If you select "FLO-Design JAN2017", a list of current participants will appear.
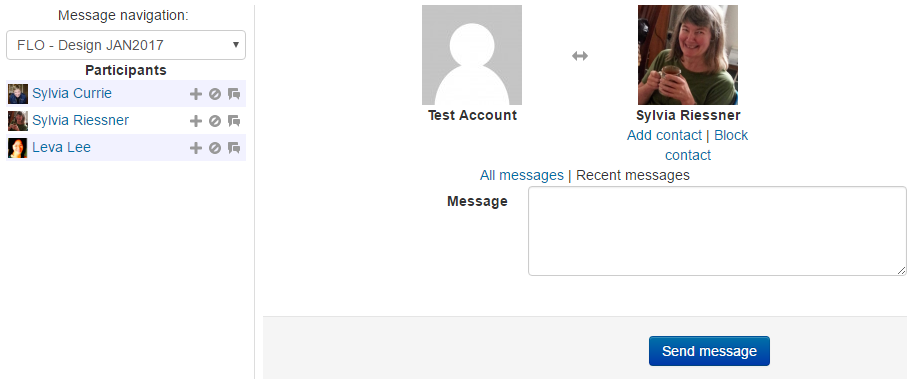
3. When you click on the name of a participant, a blank message box appears and you can enter your message and press "Send message".
Responses to messages will appear on your screen when you return to the workshop page. |
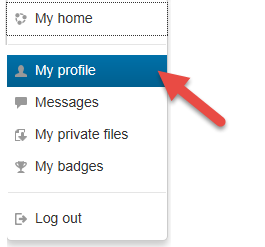
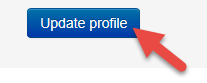
How do I edit my profile details?
|
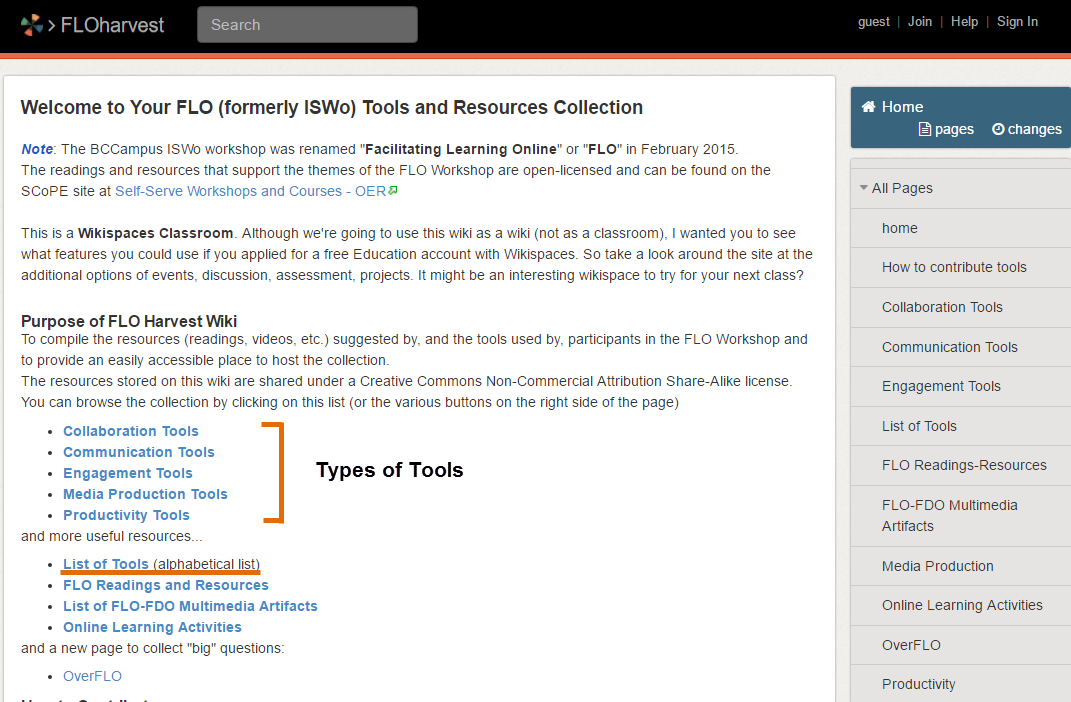
How do I find ideas for collaborative online toolsMoodle includes a variety of tools to create spaces for collaboration and communication. Check out this University of Massachusetts Amhert page "Group Communication & Collaboration Spaces in Moodle" If you're looking for for web-based tools or mobile apps, check out the FLO Harvest Wiki - a Wikispaces site that stores all the free tools tried by FLO workshop participants. You can find the FLO Harvest Wiki from your Quick Links block or go to http://iswharvest.wikispaces.com/
|